Instructions
- Prepare the apples: Peel, core, and thinly slice the 3 medium apples. Aim for slices about 1/8 to 1/4 inch thick so they cook quickly and evenly.
- Sauté the apples: In a 9 or 10-inch oven-safe, non-stick skillet (preferably cast iron or heavy-bottomed), melt 2 tablespoons of unsalted butter over medium heat.
- Add the sliced apples to the skillet. Sprinkle with 1/4 cup granulated sugar, 1/2 teaspoon ground cinnamon, and a pinch of ground nutmeg (if using).
- Cook the apples, stirring occasionally, for 5-7 minutes, or until they are tender-crisp and slightly caramelized. They should still hold their shape but be easily pierced with a fork. Spread them evenly across the bottom of the skillet.
- Preheat your oven to 375°F (190°C) during the last few minutes of apple cooking, or immediately after.
- Prepare the batter: While the apples are cooking, in a medium bowl, whisk together the all-purpose flour, 1/2 cup granulated sugar, baking powder, and salt.
- In a separate small bowl, whisk together the large egg, 1/2 cup milk, 2 tablespoons melted unsalted butter, and 1 teaspoon vanilla extract until well combined.
- Pour the wet ingredients into the dry ingredients and stir with a whisk or spatula until just combined. Be careful not to overmix; a few lumps are okay.
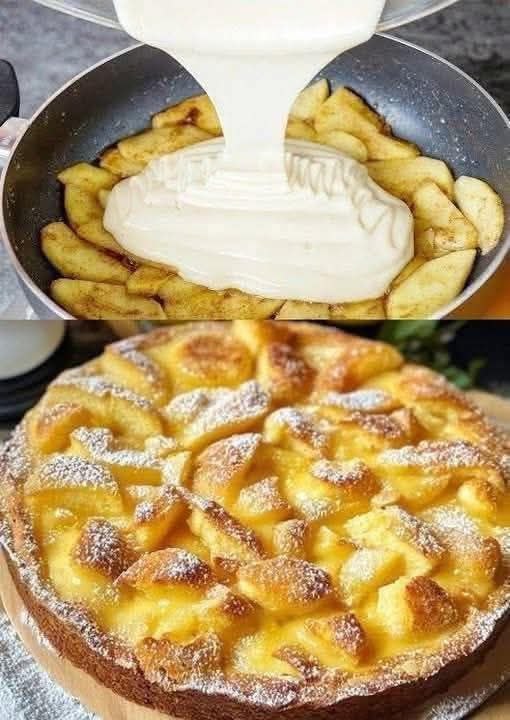
- Assemble the pie: Pour the prepared batter evenly over the sautéed apples in the skillet. Use a spatula to gently spread the batter to cover all the apples.
- Bake the pie: Transfer the skillet to the preheated oven. Bake for 20-25 minutes, or until the top is golden brown, and a toothpick inserted into the center of the cake part comes out clean.
- Cool and serve: Once baked, carefully remove the skillet from the oven. Let the pie cool in the skillet for at least 10-15 minutes before serving. This allows it to set properly.
- Optional: Dust generously with powdered sugar before serving for a beautiful finish and extra sweetness. Serve warm, perhaps with a scoop of vanilla ice cream or a dollop of whipped cream.
Cooking Tips and Variations
For the best results with this speedy apple pie, start with the right apples. Firmer varieties like Honeycrisp, Gala, Fuji, or Granny Smith work wonderfully as they hold their shape well when cooked but still soften beautifully. Avoid overly soft or mealy apples, as they can turn to mush. When slicing the apples, aim for uniform thickness, ideally about 1/8 to 1/4 inch. This ensures they cook evenly and become tender at the same rate. If your slices are too thick, they won’t cook through in the pan quickly enough; too thin, and they might disintegrate. Don’t be afraid to add a little extra spice to your apples if you love a bolder flavor profile; a pinch of allspice or cardamom can elevate the taste. For the batter, avoid overmixing. Overmixing flour develops gluten, which can lead to a tough cake. Mix until just combined, even if there are a few small lumps, for a tender and moist crumb.
A good quality, heavy-bottomed, oven-safe non-stick skillet is crucial for this recipe. Cast iron works exceptionally well as it provides even heat distribution, which is important for both pan-frying the apples and baking the batter. If you don’t have an oven-safe skillet, you can transfer the sautéed apples to a pie dish or cake pan before pouring the batter over and baking, though this adds an extra step and another dish to wash. Keep an eye on the pie during the last few minutes of baking. Ovens can vary, and you want the top to be nicely golden brown without burning. If you notice it browning too quickly, you can loosely tent it with aluminum foil. This recipe is wonderfully adaptable for variations. For a nutty crunch, sprinkle a handful of chopped walnuts or pecans over the apples before pouring the batter. For an extra hint of sweetness and chewiness, a tablespoon or two of raisins or dried cranberries can be added to the apples as they sauté. You can also experiment with different spices; a touch of ginger or a blend of pumpkin pie spice would be lovely. For a more decadent touch, drizzle a little caramel sauce over the cooked apples before adding the batter.
If you’re looking for a gluten-free option, you can easily substitute the all-purpose flour with a 1:1 gluten-free baking flour blend that contains xanthan gum. The batter should still come together nicely and bake with a similar texture. For a dairy-free or vegan version, use a plant-based butter alternative and a non-dairy milk (such as almond or oat milk) for both the apples and the batter. For the egg, a flax egg (1 tablespoon ground flaxseed meal mixed with 3 tablespoons water, let sit for 5 minutes) can often work as a binder in recipes like this, though the texture might be slightly different. Remember to adjust baking times slightly if you make significant substitutions, as different ingredients can affect cooking. Finally, don’t rush the cooling process. Letting the pie rest in the skillet for 10-15 minutes allows the internal structure to set, making it easier to slice and serve without crumbling. The residual heat in the skillet also continues to gently cook the pie, ensuring a perfectly done dessert.
Storage and Reheating
This quick apple pie is best enjoyed warm and fresh from the oven, but leftovers can be stored for a day or two. To store, first allow the pie to cool completely to room temperature. Once cooled, you can either cover the entire skillet tightly with plastic wrap or aluminum foil, or carefully transfer individual slices to an airtight container. Refrigerate for up to 2 days. Storing it in the refrigerator helps maintain its freshness and prevents the apples from spoiling. Beyond 2 days, the texture of the apples and the cake may start to degrade, becoming a bit softer.
When you’re ready to enjoy a leftover slice, there are a couple of good reheating options. For the best texture, especially if you want a slightly crispy top, reheat individual slices in a toaster oven or a conventional oven. Preheat your oven to 300°F (150°C), place a slice on a baking sheet, and heat for about 10-15 minutes, or until warmed through. This method helps to revive the cake’s texture and makes the apples tender again without becoming mushy. If you’re short on time, you can also reheat a slice in the microwave. Place a slice on a microwave-safe plate and heat on medium power for 30-60 seconds, or until warm. Be aware that microwave reheating might make the cake a little softer and less crisp, but it’s a perfectly acceptable quick option for a warm treat. Avoid reheating the entire pie multiple times, as this can dry it out. It’s best to reheat only the portion you plan to eat.
Frequently Asked Questions
What kind of apples are best for this pie?
For this quick apple pie, firmer apples that hold their shape well during cooking are ideal. Varieties like Gala, Fuji, Honeycrisp, or even Granny Smith (if you prefer a tarter pie) work wonderfully. Avoid overly soft or mealy apples as they can turn mushy during the pan-frying and baking process.
Can I make this pie ahead of time?
While this pie is truly best enjoyed warm and fresh, it can be made a few hours in advance. If making ahead, allow it to cool completely, then cover it and leave it at room temperature for up to 4-6 hours. For longer storage, refrigerate as described in the storage section. Reheat gently before serving for the best experience.
Do I really need an oven-safe skillet?
Yes, an oven-safe skillet is crucial for this specific recipe as the apples are cooked and the batter is baked directly in the same pan. A cast iron skillet or a heavy-bottomed, non-stick skillet without plastic handles that can withstand oven temperatures is perfect. If you don’t have one, you can sauté the apples in a regular pan, then transfer them to a greased 9 or 10-inch pie plate or cake pan before pouring the batter over and baking.
Can I add nuts or other fruits?
Absolutely! This recipe is very adaptable. You can sprinkle a handful of chopped nuts like walnuts or pecans over the sautéed apples before adding the batter for an extra crunch. A tablespoon or two of raisins or dried cranberries can also be added to the apples while they cook for additional sweetness and chewiness. Just be mindful of not overcrowding the pan, especially with other fruits, as it could affect the baking time and moisture content.