Instructions
- Prepare the Rice: Rinse the short-grain Japanese rice thoroughly under cold water until the water runs clear. This removes excess starch and prevents stickiness. Combine the rinsed rice and 3 cups of water in a medium saucepan. Bring to a boil, then reduce heat to low, cover, and simmer for 15-18 minutes, or until all water is absorbed. Remove from heat and let stand, covered, for 10 minutes before fluffing with a fork.
- Prepare the Chicken Katsu: Place each chicken breast between two sheets of plastic wrap. Using a meat mallet or rolling pin, pound the chicken to an even thickness of about 1/2 inch. This ensures even cooking and tenderness. Season both sides of the pounded chicken with salt and freshly ground black pepper.
- Set Up Breading Station: Prepare three shallow dishes. In the first, place the all-purpose flour. In the second, whisk the eggs. In the third, place the panko breadcrumbs.
- Bread the Chicken: Dredge each chicken cutlet first in the flour, shaking off any excess. Then dip it into the beaten eggs, ensuring it’s fully coated. Finally, press the chicken firmly into the panko breadcrumbs, making sure the entire surface is generously covered. This double-dredging technique ensures maximum crispiness. Set the breaded chicken aside on a plate or wire rack.
- Cook the Japanese Curry: In a large pot or Dutch oven, melt the unsalted butter over medium heat. Add the finely diced yellow onion and sauté for 5-7 minutes until softened and translucent, being careful not to brown it.
- Stir in the diced carrots and potatoes. Cook for another 5-7 minutes, stirring occasionally, allowing the vegetables to slightly soften and release their flavors.
- Pour in the chicken or vegetable broth. Bring the mixture to a boil, then reduce the heat to a simmer. Cover and cook for 15-20 minutes, or until the potatoes and carrots are tender.
- Remove the pot from the heat. Break the Japanese curry roux blocks into smaller pieces and add them to the hot liquid. Stir continuously until the roux blocks are completely dissolved and the curry sauce thickens to your desired consistency. If the sauce is too thick, add a little more broth or water; if too thin, simmer uncovered for a few more minutes. Taste and adjust seasoning if necessary. Keep warm over very low heat.
- Fry the Chicken Katsu: Heat the vegetable oil in a large deep skillet or Dutch oven over medium-high heat until it reaches 350-375°F (175-190°C). If you don’t have a thermometer, a small piece of panko should sizzle vigorously and turn golden brown within 30 seconds when dropped into the oil.
- Carefully place one or two breaded chicken cutlets into the hot oil, ensuring not to overcrowd the pan, which can lower the oil temperature and result in soggy katsu. Fry for 3-5 minutes per side, or until golden brown and cooked through (internal temperature should reach 165°F / 74°C).
- Using tongs, remove the cooked katsu from the oil and place it on a wire rack set over a baking sheet to drain excess oil. This helps maintain crispiness. Repeat with any remaining chicken cutlets.
- Assemble and Serve: Slice each crispy chicken katsu into 1-inch strips.
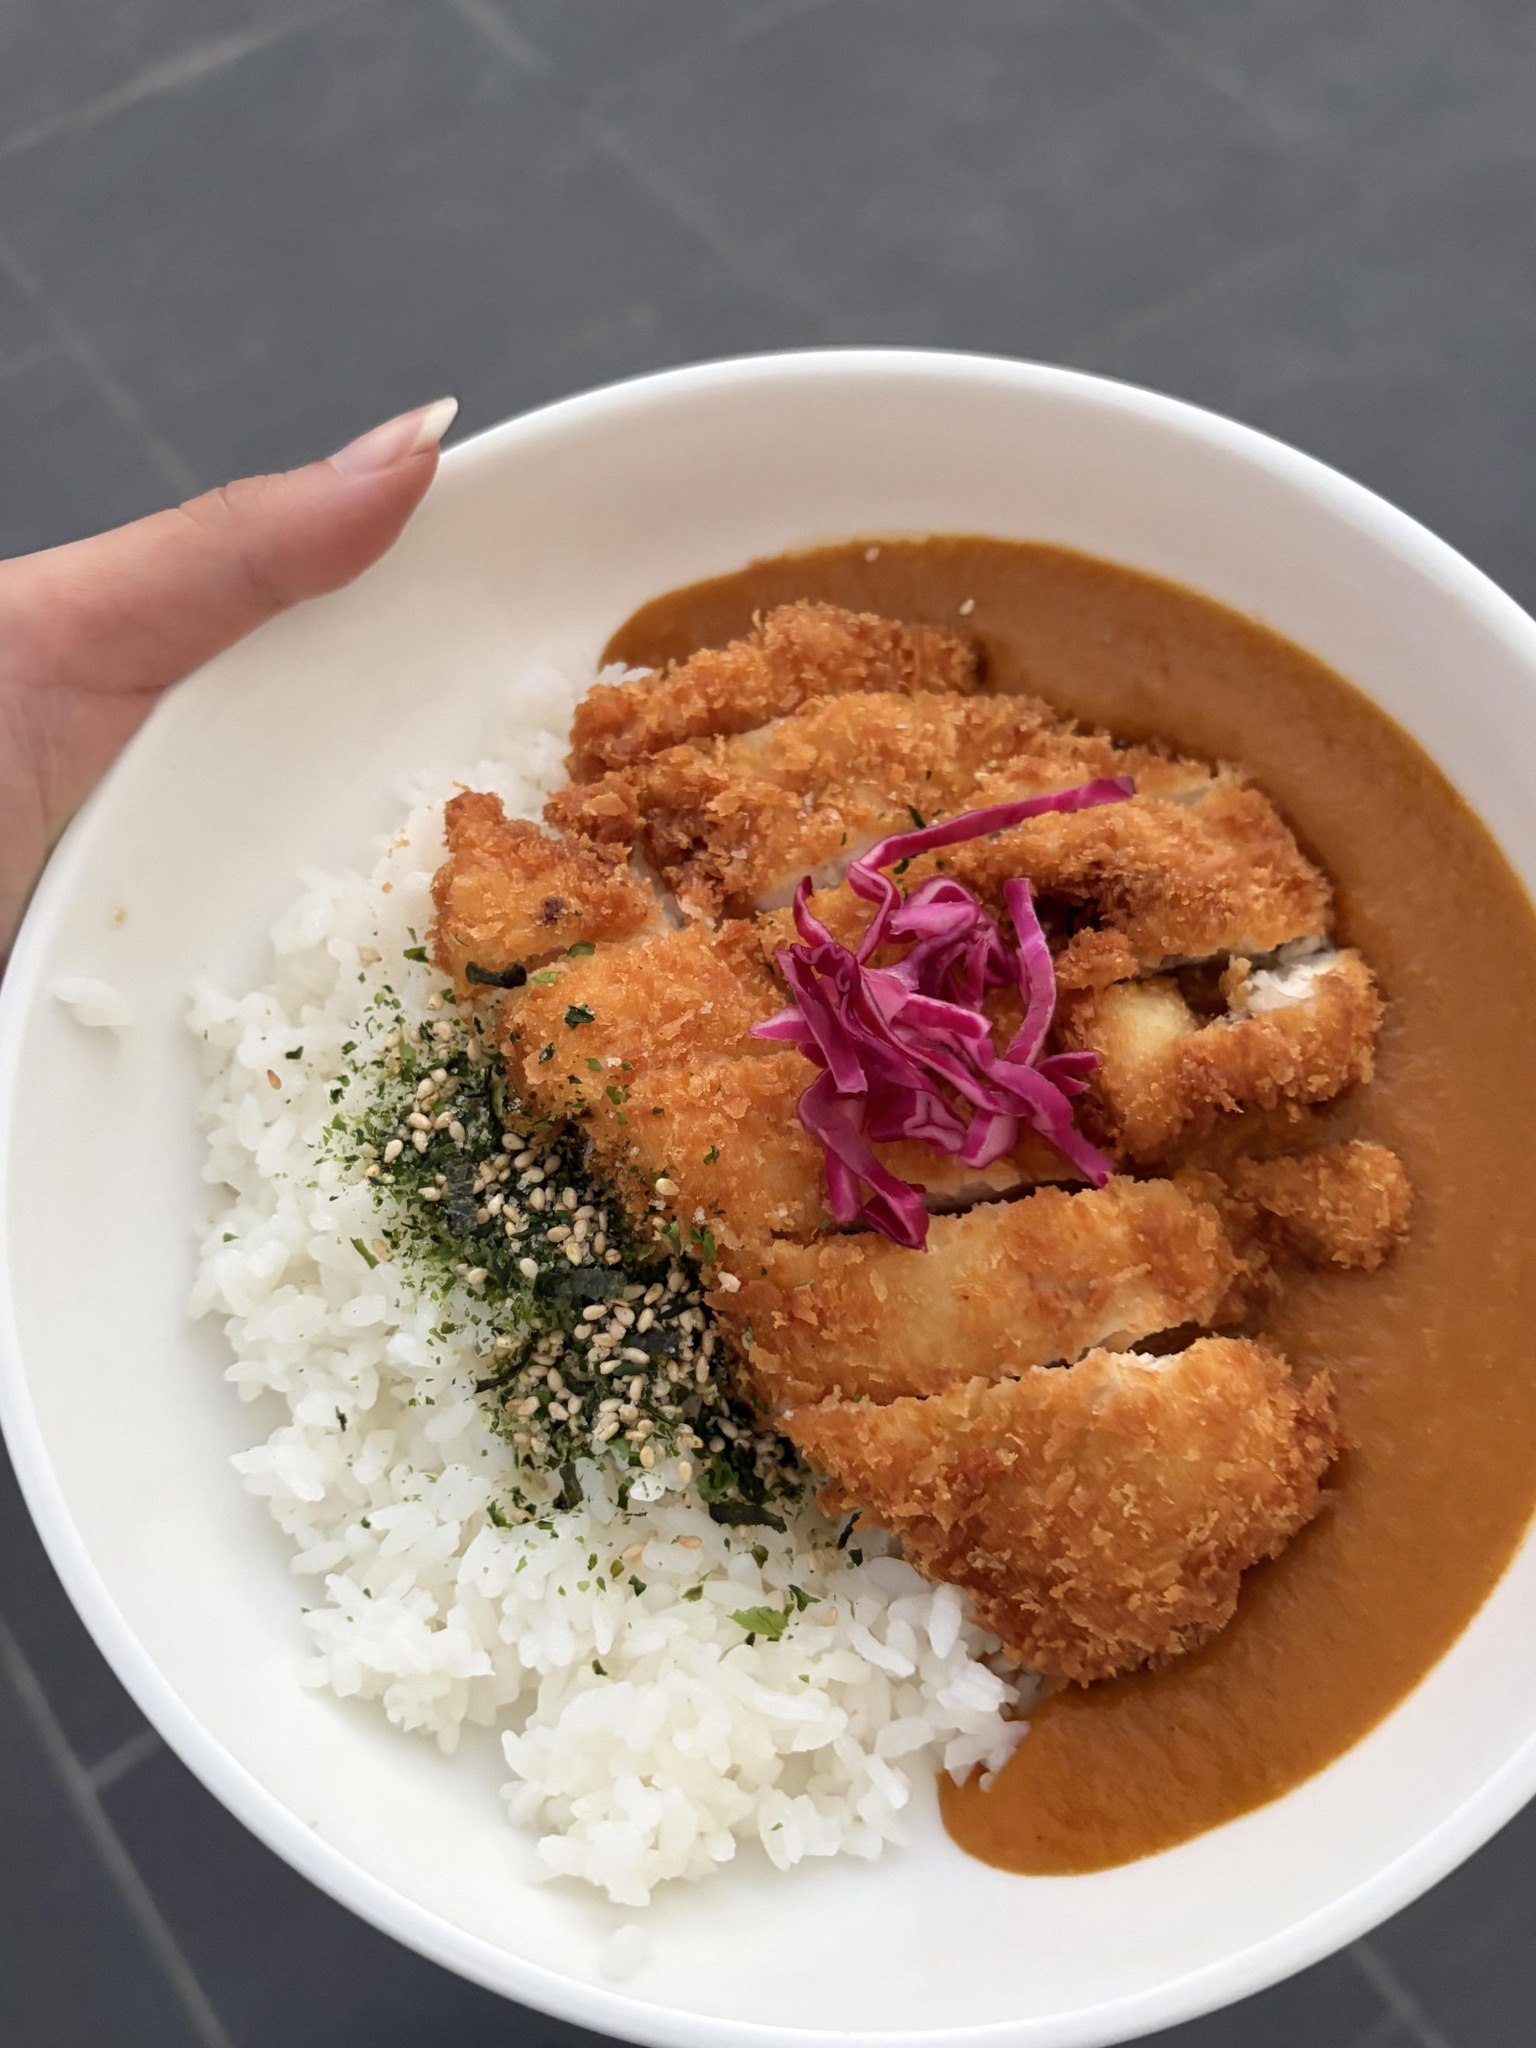
- To serve, place a generous portion of fluffy Japanese rice on a plate. Arrange the sliced chicken katsu next to or slightly overlapping the rice. Ladle a generous amount of the rich, savory Japanese curry sauce over the katsu and rice.
- Garnish with thinly sliced red cabbage, a sprinkle of furikake, or any other desired toppings like pickled ginger or chopped scallions. Serve immediately and enjoy the ultimate comfort food experience!
Cooking Tips and Variations
- Achieving Ultimate Crispy Katsu: The key to truly crispy katsu lies in a few crucial steps. First, ensure your chicken is pounded to an even thickness; this allows for uniform cooking. Second, use quality panko breadcrumbs, as their flaky texture creates a superior crunch compared to regular breadcrumbs. Third, maintain the oil temperature between 350-375°F (175-190°C). Too low, and the katsu will absorb too much oil and become greasy; too high, and the outside will burn before the inside cooks. Don’t overcrowd the pan, as this drops the oil temperature.
- Pounding Chicken Perfectly: When pounding the chicken, cover it with plastic wrap to prevent splattering. Use the flat side of a meat mallet or a rolling pin. Aim for about 1/2 inch thickness. This tenderizes the meat and creates a larger surface area for that delicious panko coating.
- Curry Depth of Flavor: For an even richer curry, sauté the diced onions until they are deeply caramelized, almost brown, before adding the other vegetables. This brings out their natural sweetness and adds layers of umami. You can also add a bay leaf to the simmering broth for extra aroma, removing it before adding the roux. A dash of soy sauce or Worcestershire sauce can also deepen the curry’s savory notes.
- Vegetable Variations: While carrots and potatoes are classic, feel free to experiment with other vegetables. Bell peppers, mushrooms, peas, or even Japanese pumpkin (kabocha) can be excellent additions. Add them according to their cooking times – tougher vegetables earlier, softer ones later.
- Spice Level Adjustment: Japanese curry roux blocks come in various spice levels – mild, medium, hot, and extra hot. Choose according to your preference. If you can only find mild and want more heat, you can add a pinch of cayenne pepper or a dash of chili oil to your individual serving.
- Gluten-Free Option: To make this dish gluten-free, use gluten-free all-purpose flour, gluten-free panko breadcrumbs, and ensure your curry roux blocks are certified gluten-free (some brands offer this).
- Make-Ahead Tips: The curry sauce can be made a day or two in advance and stored in the refrigerator. It often tastes even better the next day as the flavors meld. You can also bread the chicken katsu ahead of time and refrigerate it on a wire rack for a few hours before frying, which can help the coating adhere better. However, for peak crispiness, fry the katsu just before serving.
Storage and Reheating
Storing and reheating Chicken Katsu Curry properly is key to enjoying its deliciousness even as leftovers, though it’s worth noting that the katsu’s crispiness is best when freshly made.
- Storage:
- Chicken Katsu: Store cooked and cooled chicken katsu separately from the curry sauce and rice. Place it in an airtight container in the refrigerator for up to 3 days.
- Japanese Curry Sauce: Transfer the cooled curry sauce to an airtight container and refrigerate for up to 4-5 days.
- Cooked Rice: Store leftover rice in a separate airtight container in the refrigerator for up to 3-4 days.
- Reheating:
- Chicken Katsu (for crispiness): The best way to reheat katsu to regain some crispiness is in an oven or air fryer. Preheat your oven to 375°F (190°C) or air fryer to 350°F (175°C). Place the katsu on a baking sheet or in the air fryer basket in a single layer. Heat for 10-15 minutes in the oven, or 5-8 minutes in the air fryer, flipping halfway, until heated through and crisp. Avoid microwaving katsu, as it will become soggy.
- Japanese Curry Sauce: Gently reheat the curry sauce in a saucepan over medium-low heat, stirring occasionally, until it’s simmering and heated through. You may need to add a splash of water or broth if it has thickened too much in the refrigerator.
- Cooked Rice: Reheat rice in the microwave with a splash of water, covered, or steam it on the stovetop until hot and fluffy.
- Assembly: Once all components are reheated, assemble your fresh plate of Katsu Curry as described in the instructions.
Frequently Asked Questions
Can I bake or air fry the chicken katsu instead of deep frying?
Yes, you can! While deep frying yields the crispiest results, baking or air frying are healthier alternatives. For baking, preheat your oven to 400°F (200°C), lightly spray the breaded chicken with oil, and bake for 20-25 minutes, flipping halfway, until golden brown and cooked through. For air frying, preheat your air fryer to 375°F (190°C), lightly spray the breaded chicken with oil, and air fry for 12-15 minutes, flipping halfway, until golden and crisp. The texture may not be quite as shatteringly crisp as deep-fried, but it will still be delicious.
What if my curry sauce is too thin or too thick?
If your curry sauce is too thin, you can simmer it uncovered over low heat for a bit longer, allowing some of the liquid to evaporate and the sauce to reduce and thicken. Alternatively, you can make a quick slurry with a tablespoon of cornstarch mixed with a tablespoon of cold water, then whisk it into the simmering curry and cook for another minute until it thickens. If your curry sauce is too thick, simply stir in a little more chicken broth, vegetable broth, or even water, a tablespoon at a time, until you reach your desired consistency.
What’s the best type of rice to use for Katsu Curry?
The ideal rice for Katsu Curry is short-grain Japanese rice (often labeled “sushi rice” or “Calrose rice”). This type of rice has a slightly sticky, firm texture that perfectly complements the rich curry sauce and crispy katsu. It holds its shape well and is easy to eat with chopsticks or a spoon. While other rice types can be used in a pinch, they won’t offer the same authentic texture and mouthfeel.
Can I make this dish vegetarian?
Absolutely! To make this dish vegetarian, substitute the chicken breast with thick slices of firm tofu (pressed and drained well), eggplant, portobello mushrooms, or even sweet potato slices. Bread and fry them in the same manner as the chicken katsu. Ensure you use vegetable broth instead of chicken broth for the curry sauce and confirm that your Japanese curry roux blocks do not contain any animal products (most brands offer vegetarian options). The result will be an equally comforting and delicious vegetarian katsu curry.