Instructions
- Preheat Oven and Prepare Bakeware: Preheat your oven to 325°F (160°C). Select a baking dish (a 9×13-inch pan works well for a water bath, or individual ramekins) and have it ready. If using individual ramekins, you’ll need a larger roasting pan to create a water bath.
- Warm the Milk and Cream: In a medium saucepan, combine the whole milk and heavy cream. Heat over medium-low heat until small bubbles begin to form around the edges of the pan and the mixture is warm to the touch, but not boiling. Do not let it boil. Remove from heat and set aside.
- Whisk Eggs, Sugar, Salt, and Vanilla: In a large mixing bowl, whisk together the eggs, granulated sugar, salt, and vanilla extract until well combined and the mixture is pale yellow and slightly frothy. This step is crucial for incorporating air and ensuring a smooth texture.
- Temper the Eggs: Slowly, and while continuously whisking, gradually pour the warm milk and cream mixture into the egg mixture. Pouring too quickly can scramble the eggs. This process, known as tempering, gently brings the eggs up to temperature, preventing them from cooking prematurely.
- Strain the Custard Mixture: For the ultimate silky texture, strain the custard mixture through a fine-mesh sieve into another clean bowl or directly into your prepared ramekins/baking dish. This removes any bits of cooked egg or chalazae, ensuring a perfectly smooth custard.
- Prepare the Water Bath (Bain-Marie): If using individual ramekins, place them in the larger roasting pan. Carefully pour the strained custard mixture into the ramekins or the baking dish, filling them about two-thirds full. Place the roasting pan (with the ramekins or baking dish inside) onto the oven rack. Carefully pour hot water into the roasting pan, ensuring it comes at least halfway up the sides of the ramekins or baking dish. This water bath creates a gentle, moist cooking environment, preventing the custard from cracking and ensuring even, silky results.
- Bake the Custard: Carefully transfer the roasting pan with the water bath to the preheated oven. Bake for 45-60 minutes for individual ramekins, or 60-75 minutes for a larger baking dish. The exact baking time will vary depending on your oven and the size of your dish. The custard is done when the edges are set and a knife inserted about an inch from the center comes out clean, or when the center still has a slight jiggle. Do not overbake!
- Cool and Chill: Carefully remove the roasting pan from the oven. Let the custards cool in the water bath for about 15-20 minutes. Then, carefully remove the ramekins or baking dish from the water bath and place them on a wire rack to cool completely at room temperature. Once cooled, cover with plastic wrap and refrigerate for at least 4 hours, or preferably overnight, until thoroughly chilled and set.
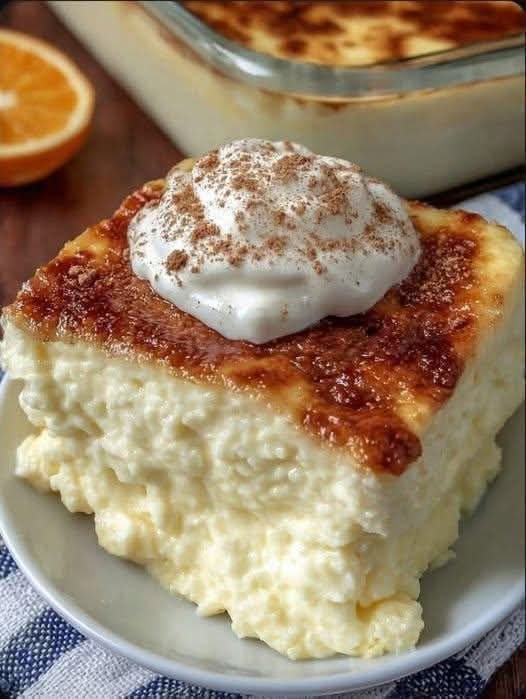
- Serve and Garnish: Once chilled, your Silky Amish Baked Custard is ready to be enjoyed. Serve directly from the ramekins or slice from the larger dish. Garnish with a generous sprinkle of freshly grated nutmeg. For an extra touch of indulgence, top with a dollop of freshly whipped cream and a sprinkle of orange zest.
Cooking Tips and Variations
Achieving that coveted “silky” texture in your Amish Baked Custard is all about precision and patience. Here are some essential tips to ensure your custard turns out perfectly every time:
- Use a Water Bath (Bain-Marie): This is arguably the most crucial step for a truly silky custard. The water bath provides a gentle, even heat, preventing the edges from overcooking before the center is set. It also keeps the custard moist, preventing cracks and a rubbery texture. Don’t skip it!
- Don’t Overbake: Overbaking is the enemy of silky custard. The custard should still have a slight jiggle in the center when you remove it from the oven. It will continue to set as it cools. If you bake it until it’s completely firm, it will likely be dry and rubbery.
- Temper Your Eggs Properly: Slowly pouring the warm milk into the egg mixture while whisking constantly is vital. This gradually raises the temperature of the eggs, preventing them from scrambling. If you pour too quickly, you’ll end up with scrambled eggs in your custard.
- Strain for Smoothness: Passing the custard mixture through a fine-mesh sieve removes any tiny bits of cooked egg or chalazae (the stringy bits in egg whites), ensuring an incredibly smooth and uniform texture. This small step makes a big difference.
- High-Quality Ingredients: Since this recipe uses so few ingredients, the quality of each one shines through. Use fresh, large eggs, good quality whole milk, and pure vanilla extract for the best flavor.
- Chill Thoroughly: While it’s tempting to dig in immediately, allowing the custard to chill completely in the refrigerator is essential for it to fully set and for the flavors to meld.
- Adjust Sweetness: The 1/2 cup of sugar provides a moderate sweetness. If you prefer a sweeter custard, you can increase it by a tablespoon or two, but be mindful not to make it overly sweet, as it can detract from the delicate milk and egg flavors.
- Preventing a “Skin”: To prevent a skin from forming on the surface during baking, you can loosely cover your baking dish or ramekins with aluminum foil for the first half of the baking time, removing it to allow the top to lightly brown.
Variations:
- Spiced Custard: Add 1/4 teaspoon of ground cinnamon or a pinch of cardamom to the milk mixture for a warm, aromatic twist. You could also infuse the milk with a cinnamon stick or whole cloves, straining them out before combining with the eggs.
- Lemon or Orange Zest: For a bright, citrusy note, add 1-2 teaspoons of finely grated lemon or orange zest to the milk while it warms, allowing it to infuse, then strain it out.
- Coffee Custard: Dissolve 1-2 tablespoons of instant espresso powder or strong instant coffee into the warm milk mixture for a delightful coffee-flavored custard.
- Coconut Custard: Substitute half of the whole milk with full-fat canned coconut milk for a subtle tropical flavor.
- Almond Extract: Replace half of the vanilla extract with 1/2 teaspoon of pure almond extract for a distinct nutty flavor.
- Caramelized Top (Crème Brûlée Style): For a crispy, caramelized sugar crust, sprinkle a thin, even layer of granulated sugar or turbinado sugar over the chilled custard. Use a kitchen torch to melt and caramelize the sugar until golden brown and bubbly.
- Fruit Toppings: Serve with fresh berries, sliced peaches, or a simple fruit compote for a refreshing contrast.
- Chocolate Swirl: Gently swirl in a tablespoon or two of melted chocolate into the custard mixture just before baking for a marbled effect.
Storage and Reheating
Amish Baked Custard is one of those wonderful desserts that actually tastes better after a day or two, once the flavors have had a chance to fully develop and meld. Proper storage is key to maintaining its silky texture and freshness.
Storage:
- Refrigeration: Once your custard has cooled completely to room temperature, cover it tightly with plastic wrap or transfer it to an airtight container. Store in the refrigerator for up to 3-4 days. Ensure it is well-sealed to prevent it from absorbing odors from other foods in the fridge.
- Freezing: While technically possible, freezing is generally not recommended for baked custards. The delicate, silky texture can become grainy or watery upon thawing due to the separation of liquids. If you absolutely must freeze it, do so in individual portions in airtight, freezer-safe containers for up to 1 month. Thaw slowly in the refrigerator.
Serving:
- Amish Baked Custard is traditionally served chilled, which truly enhances its silky texture and refreshing quality. Remove it from the refrigerator about 15-20 minutes before serving to allow it to lose some of its chill, which can sometimes mute flavors.
- You can serve it directly from individual ramekins or slice it from a larger baking dish.
- Always garnish just before serving. Freshly grated nutmeg is classic. Whipped cream, a sprinkle of cinnamon, or fresh fruit are also excellent choices.
Reheating:
- Generally, Amish Baked Custard is not reheated as it is meant to be served chilled. Reheating can alter its delicate texture, potentially making it rubbery or causing it to weep.
- If you prefer a slightly warmer custard (though this is less traditional for this specific type of custard), you can gently warm individual portions in a microwave on a very low setting for short bursts (15-20 seconds at a time) until just slightly warm, being extremely careful not to overheat it. Alternatively, you can place a ramekin in a warm water bath on the stovetop for a few minutes. However, be aware that the texture may not be as pristine as when served chilled.
Frequently Asked Questions
What is the difference between Amish baked custard and regular baked custard?
The primary difference lies in the emphasis on texture. While many baked custards aim for a firm, sliceable consistency, Amish baked custard prioritizes an exceptionally smooth, almost liquid-velvet “silky” texture. This is often achieved through a higher proportion of liquid (milk/cream) to eggs compared to some other custards, and meticulous attention to gentle baking in a water bath to prevent overcooking and cracking. The flavor profile is also typically very simple, highlighting the purity of dairy, eggs, and vanilla.
Why did my custard crack on top?
Cracks on the surface of your baked custard are almost always a sign of overbaking or baking at too high a temperature. When custard bakes too quickly or for too long, the proteins in the eggs contract excessively, causing the surface to pull apart and crack. Using a water bath (bain-marie) is crucial for preventing this, as it provides a gentle, even heat that keeps the custard moist and prevents the edges from setting too fast.
Can I make this custard dairy-free?
While traditional Amish baked custard relies heavily on dairy for its rich flavor and creamy texture, you can experiment with dairy-free alternatives. Full-fat canned coconut milk, almond milk, or cashew milk can be used in place of whole milk and heavy cream. Be aware that the flavor and texture will be different – coconut milk will impart a distinct coconut flavor, and plant-based milks may result in a slightly less rich or silky texture due to their differing fat and protein content. You might also need to adjust the sugar slightly to compensate for differences in sweetness.
How do I know when the custard is done baking?
The key to perfectly baked custard is to remove it from the oven when it’s just set. The edges should appear firm, but the center (about 1-2 inches in diameter) should still have a slight jiggle or wobble when you gently shake the pan or ramekin. If you insert a thin knife or skewer about an inch from the center, it should come out clean. The custard will continue to set as it cools, so it’s better to slightly underbake than overbake to maintain that desirable silky texture.