Instructions
Step 1: Prepare the Cake Layers
- Preheat your oven to 350°F (175°C). Grease and flour three 8-inch round cake pans, or line with parchment paper circles.
- In a medium bowl, whisk together the sifted flour, baking powder, baking soda, and salt. Set aside.
- In a large bowl, using an electric mixer, cream together the softened butter and granulated sugar on medium-high speed until light and fluffy, about 3-5 minutes.
- Add the eggs one at a time, beating well after each addition. Scrape down the sides of the bowl as needed. Beat in the vanilla extract.
- With the mixer on low speed, gradually add the dry ingredients to the wet ingredients in three additions, alternating with the buttermilk in two additions, beginning and ending with the dry ingredients. Mix until just combined; do not overmix.
- Divide the batter evenly among the prepared cake pans.
- Bake for 25-30 minutes, or until a wooden skewer inserted into the center comes out clean.
- Let the cake layers cool in the pans for 10-15 minutes before inverting them onto a wire rack to cool completely.
Step 2: Prepare the Simple Syrup (Optional)
- While the cakes are cooling, if using, combine water and sugar in a small saucepan over medium heat. Stir until the sugar dissolves completely.
- Remove from heat and let cool completely before using.
Step 3: Prepare the Berry Filling
- In a medium bowl, gently combine the sliced strawberries, blueberries, and raspberries.
- If desired, sprinkle with 2 tablespoons of granulated sugar and 1 teaspoon of lemon juice. Gently toss and let sit for 10-15 minutes to allow the berries to release some of their juices and macerate slightly.
Step 4: Make the Mascarpone Chantilly Frosting
- In a large, very cold mixing bowl (you can chill the bowl and whisk attachment in the freezer for 10-15 minutes), combine the very cold mascarpone cheese, heavy cream, sifted powdered sugar, and vanilla extract.
- Using an electric mixer with the whisk attachment, start on low speed to combine the ingredients, then gradually increase to medium-high speed.
- Whip until stiff peaks form. Be careful not to overmix, or the mascarpone can become grainy and separate. The frosting should be thick, creamy, and hold its shape.
Step 5: Assemble the Cake
- Once the cake layers are completely cool, use a serrated knife to level the tops if necessary, creating flat surfaces for stacking.
- Place one cake layer on your serving plate or cake stand. If using, brush generously with the cooled simple syrup.
- Spread about 1 cup of mascarpone frosting evenly over the first cake layer.
- Arrange about one-third of the mixed fresh berries over the frosting, pressing them gently into the cream.
- Carefully place the second cake layer on top, brush with simple syrup, and repeat with another cup of frosting and one-third of the berries.
- Place the third cake layer on top, brush with simple syrup.
- Apply a thin crumb coat of frosting all over the top and sides of the cake. This helps to seal in any loose crumbs. Chill the cake in the refrigerator for 15-20 minutes to set the crumb coat.
- Once the crumb coat is set, apply the remaining mascarpone frosting to the top and sides of the cake, smoothing it with an offset spatula or bench scraper.
Step 6: Decorate and Chill
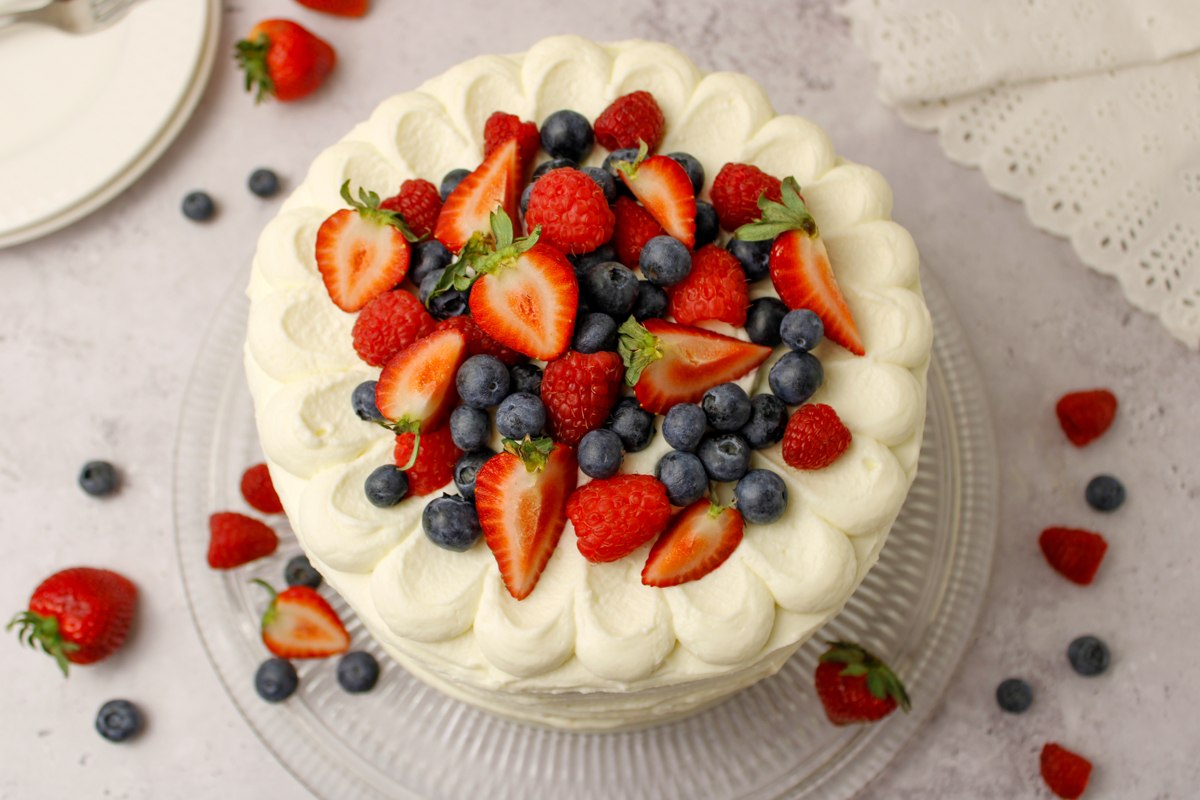
- Transfer any remaining frosting to a piping bag fitted with a decorative tip (such as a large star tip). Pipe rosettes or decorative borders around the top edge of the cake.
- Arrange the remaining fresh berries artfully on top of the cake, either in the center or around the piped border. Ensure the berries are dry before placing them to prevent color bleeding.
- Chill the assembled cake in the refrigerator for at least 30 minutes before slicing and serving. This allows the frosting to firm up and the flavors to meld.
Cooking Tips and Variations
For the moistest cake layers, ensure all your dairy ingredients (butter, eggs, buttermilk) are at room temperature before mixing. This helps them emulsify properly, creating a smoother batter and a more tender crumb. To quickly bring eggs to room temperature, place them in a bowl of warm water for 5-10 minutes. If you don’t have buttermilk, you can make your own by adding 1 tablespoon of white vinegar or lemon juice to 1 cup of regular milk and letting it sit for 5 minutes before using.
When making the mascarpone frosting, it’s crucial that both the mascarpone cheese and heavy cream are very cold. Chilling your mixing bowl and whisk attachment for 10-15 minutes beforehand will also significantly help in achieving stiff peaks. Watch the frosting closely while whipping; mascarpone can go from perfectly whipped to grainy very quickly if overmixed. Stop as soon as stiff peaks form. If your frosting seems too soft, you can chill it in the refrigerator for 15-20 minutes and then gently re-whip it for a minute or two.
To ensure neat and even cake layers, use a serrated knife to level any domed tops after the cakes have cooled. For easier frosting, chill your cake layers completely before assembling. A rotating cake stand is an invaluable tool for applying an even layer of frosting and decorating with ease. For a touch of citrus, you can add a tablespoon of lemon zest to the cake batter or a teaspoon to the mascarpone frosting. To vary the berry filling, consider adding thinly sliced kiwi or a few sprigs of fresh mint for extra flavor and visual appeal. You can also make individual mini berry Chantilly cakes using cupcake pans or small springform pans for a charming presentation.
Storage and Reheating
This Berry Chantilly Cake with Mascarpone Frosting is best enjoyed fresh, ideally within 2-3 days of assembly. To store leftovers, place the cake in an airtight cake carrier or cover loosely with plastic wrap to prevent it from drying out or absorbing refrigerator odors. Store the cake in the refrigerator. Due to the fresh berries and dairy-based frosting, this cake should always be kept chilled.
This cake does not reheat. It is designed to be served chilled. Remove the cake from the refrigerator about 15-20 minutes before serving to allow the frosting to soften slightly and the flavors to become more pronounced, but do not let it sit out at room temperature for extended periods, especially in warm environments. For optimal freshness and texture, avoid freezing the assembled cake, as the berries and frosting may become watery and lose their desired consistency upon thawing.
Frequently Asked Questions
Can I make the cake layers ahead of time?
Yes, you can absolutely bake the cake layers a day or two in advance. Once completely cooled, wrap each layer tightly in plastic wrap and store at room temperature. For longer storage, you can freeze the wrapped cake layers for up to a month. Thaw them in the refrigerator overnight before assembling.
What if my mascarpone frosting becomes grainy?
If your mascarpone frosting becomes grainy from overwhipping, it’s difficult to fully reverse. However, you can try gently folding in a tablespoon or two of very cold heavy cream to loosen it slightly and improve the texture. Be very careful not to overmix again. To prevent this, whip only until stiff peaks form and stop immediately.
Can I use frozen berries for the filling?
While fresh berries are highly recommended for the best flavor and texture, you can use frozen mixed berries if fresh are not available. Thaw the frozen berries completely and drain them thoroughly to remove excess liquid, as frozen berries tend to release more water. You might want to toss them with a little cornstarch to thicken any juices, but fresh is always preferred for this cake.
How far in advance can I assemble the cake?
For the best presentation and freshest taste, assemble the cake no more than 24 hours before serving. While it will still be delicious on day two, the berries may start to soften and release more juice, and the cake layers might become slightly more moist. Chilling the cake for at least 30 minutes after assembly is crucial for the frosting to set.